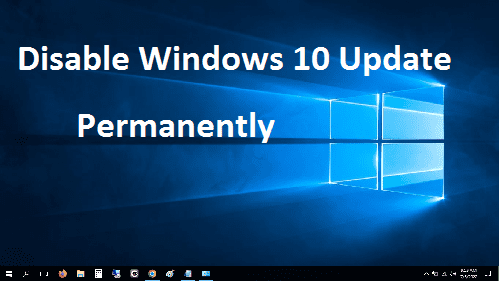
ventanas 10 es una ventana muy avanzada en este momento y muy utilizada por usuarios de todo el mundo. Tiene buenos gráficos e incluye software preinstalado profesional completo. Igual que actualiza Windows de manera muy inteligente y actualiza software útil automáticamente, pero la mayoría de las veces el usuario no necesitan que se actualicen los softwares, ya que tienen poca memoria en la computadora o un problema de disco duro bajo y realmente querían apagar/deshabilitar Windows 10 actualizar.
Pero el primer problema es que siguen sin poder encontrar la opción para deshabilitar/apagar ventanas 10 actualizar y si encuentran,no funciona correctamente, ya que apagan las ventanas o las reinician y se encienden automáticamente. Entonces, aquí le diremos una forma de trabajo permanente y perfecta para deshabilitar o apagar las ventanas. 10 actualizar.
Así que te diremos Diferentes formas de apagarlo o deshabilitar windows 10.
Apagar ventanas 10 actualización por services.msc
- Primero vaya al inicio de Windows en la esquina inferior izquierda
- Luego escriba en la barra de búsqueda para “CORRER” y haga clic en él
- Escribe “servicios.msc” en ejecutar programa
- Verás servicios (local) programa abierto
- Luego busque o desplácese hacia abajo para “actualizacion de Windows” por fin casi
- Haga clic derecho en la actualización de viudas y vaya a “Propiedades“
- Ahora en General Verás “Tipo de inicio”
- Seleccione para Deshabilitar
- Aplique los cambios y luego haga clic en Aceptar
- Reinicie su PC/Laptop y listo
Deshabilitar ventanas 10 Actualizar creando un archivo AU
- Presiona el botón windows+R
- Ejecutar el programa se iniciará y Escriba “regeditar” y presiona ok
- Tendrá su permiso para abrir, así que seleccione Sí
- Se abrirá un Editor del Registro
- Ahora ve a HKEY-LOCAL-MACHINE>SOFTWARE>POLÍTICAS>MICROSOFT>VENTANAS
- En Windows, haga clic derecho sobre él y luego “Nuevo>Llave
- En el lado izquierdo se creará la carpeta New Key,cambiarle el nombre “actualizacion de Windows” presiona la tecla enter
- De nuevo, haga clic con el botón derecho en el archivo creado por la actualización de Windows y seleccione “Nuevo>Llave”
- Cambie el nombre de esa carpeta a “Australia”(Actualización automática) y ábrelo
- Luego haga clic en el lado derecho seleccione Nuevo>PALABRA DORADA(32-un poco)valor
- Luego cambie el nombre del archivo creado con “Sin actualización automática“
- Abra este archivo y cambie los datos del valor 1 deshabilitar
Con esto tienes Desactivar Windows Update de forma permanente.
Other ways to Disable Windows 10 Update
Disabling Windows 10 updates entirely is not recommended, as updates often include important security patches, bug fixes and new features that help keep your system stable, secure and up-to-date. Sin embargo, if you need to temporarily disable updates for a specific reason you can use the following methods:
1.Using Group Policy (ventanas 10 Pro and Enterprise editions only)
– Press `Win + R` to open the Run dialog.
– Type `gpedit.msc` and press Enter to open the Local Group Policy Editor.
– In the left pane, navigate to: Computer Configuration > Administrative Templates > Windows Components > actualizacion de Windows.
– Double-click on “Configure Automatic Updates” in the right pane.
– Select the “Disabled” opción.
– Click “Apply” and then “OK” to save the changes.
2.Using the Registry Editor
– Press `Win + R` to open the Run dialog.
– Type `regedit` and press Enter to open the Registry Editor.
– Navigate to the following key: `HKEY_LOCAL_MACHINE\SOFTWARE\Policies\Microsoft\Windows`
– Right-click on the “ventanas” key, select New > Llave, and name it “WindowsUpdate” (without quotes).
– Right-click on the newly created “WindowsUpdate” key, select New > PALABRA DORADA (32-un poco) Value, and name it “AUOptions” (without quotes).
– Double-click on “AUOptions” and set its value to 2 (meaning “Notify for download and notify for install”).
– Close the Registry Editor.
3.Using Metered Connection (for Wi-Fi only)
– Go to Settings by pressing `Win + I`.
– Select “Network & Internet” and then “Wi-Fi” on the left pane.
– Click on your connected Wi-Fi network.
– Toggle the switch under “Set as metered connection” to On.
4.Using Windows Update Service (temporarily)
– Press `Win + R` to open the Run dialog.
– Type `services.msc` and press Enter to open the Services window.
– Scroll down and find “actualizacion de Windows” in the list.
– Double-click on “actualizacion de Windows” to open its properties.
– In the “Startup type” dropdown menu, select “Disabled.”
– Click on “Apply” and then “OK.”
– Remember to set it back to “Manual” o “Automatic” after you’ve completed your task.
Keep in mind that disabling updates leaves your system vulnerable to security risks and may cause compatibility issues with software and hardware. It’s generally recommended to enable updates and manage them actively rather than disable them entirely.


